It’s Summer, What are You Reading?

Yep.  It’s that time again.  Summertime!  And of course, as a teacher, it means I have time to READ!!  Ok, I am reading all the time, but this is prime sit-and-read-a-whole-book-in-one-sitting time!  So, I thought I’d share what I’ve been reading with you, and then I’d love to hear from you about what you’d suggest!

What I’ve read…

What I’m reading…

In my TBR pile…

Is there anyone who ever has time to read everything in their TBR pile?  I have the problem that mine keeps getting taller (from great suggestions) before it gets shorter (by me finishing something)!  It is totally silly, but at this point it’s up to my knees! See?

FullSizeRender 2

Oh, wait–you probably want to see the spines…here’s another version (sans me!):

IMG_2415

Bets on how long it’ll take?  I’m sure there’s a great math opportunity in there somewhere, but I’ll save that for another day!

Ok, now it’s your turn! What are you reading?  What do you suggest I read? 🙂


Lego Organization: From a Builder’s Perspective

For my son’s 7th birthday I promised him a “new” room.  He had grown out of his “big boy” transportation room (which was really just a more grown-up version of his nursery), and needed something that could last a few more years as he got older.  As may 7YOs, he was TOTALLY into Lego, and it seemed a likely theme that would work for now, as well as for many more years.  I knew that if I made sure the background was neutral and the “changeable” stuff was where the Lego came in, that would also ensure that he’d have longer before it was dated.

Well, lucky for us me, I had just painted my living room/kitchen in a fabulous gray color that is pretty close to the color of Lego base plates, and had almost a gallon leftover!  This was the foundation we needed!  The walls were quickly gray and then I worked to figure out bedding, curtains, arts, etc.  I was hoping to sew most of it, but who knew that Lego doesn’t have fabric?  Well maybe somewhere and it sells for hundreds of dollars a yard, but I could not find any in the traditional fabric stores around me, or anywhere I could think of online.  It ended up being a blessing in disguise, however, because we ended up finding options that were far more basic, and which allowed me to be a little crafty.

We landed on this bedding, and I found the pillows (and some other ideas we didn’t end up using) here.   It is reversible, too, so I think right now it’s even turned over the other way.

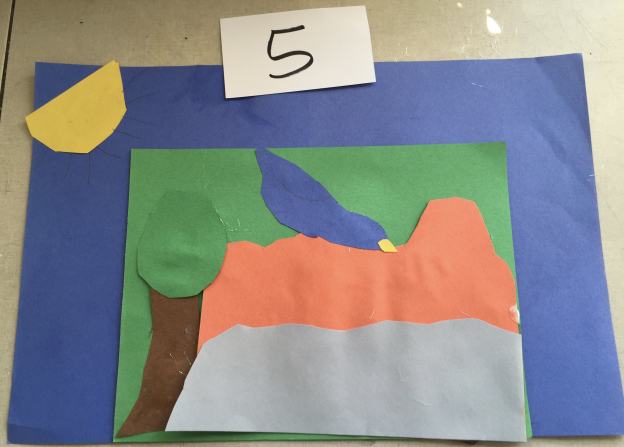
For art, we had many ideas, but only ended up using a few of the ones we started with.  One was pretty basic, and is just paper, made to look like Lego 2x2s, and the other stuff we added is not Lego-related, but is instead kid-made art from my master builder’s work at school.  Made it even more special!

IMG_2407

We used record album frames because they’re cheap and the size shape!  Just paper, with paper glued on top. 🙂

FullSizeRender

Every year our art classes do a project through Art to Remember, and parents can buy all sorts of “stuff” with their kid’s artwork on it.  We have ornaments and magnets and other things, but decided to use the original pieces as room art.  There are two empty ones because he has 4th and 5th grade to go!  (And yes, I realized they are neither perfectly-spaced or entirely-straight, but for now it’s working pretty well!  (That’s the closet wall)

Ok, so that’s all well and good, right, but I know you’re asking “so where’s the Lego organization part?” Well, ok, I promise it’s coming, but first I must sneak in a little bit of info (that you may have already figured out), and that is the fact that my 7YO just turned 9.  (We are a little slow to finish things around here! LOL)

Part of our problem was that the Lego organization was the project that required the most work and planning in order to complete.  We had ideas for adding a window seat with cubbies, that would allow for block storage as well as a place to play.  We did LOADS of research, and finally decided upon buying pre-made shelves that we turned on their sides so they’d fit under the window.  The detail that took me FOREVER to figure out, though, was that there is a vent right in the middle of the floor under the window.  We didn’t want to cover it up, and couldn’t decide how to deal with it.  Somehow, 2 years into it, I figured out that just adding legs to the cubbies would raise them above the vent, as well as making them the right height for the window seat we wanted.  A couple of coats of black paint (to match the other furniture in the room) and voila!  Win/win.  Well except that he waited on it for 2 whole years. 🙂

IMG_2318

Again, though, as we like to find the positive in all things, the two years he has spent collecting and building with Legos actually helped us in completing this project because of the knowledge he’d gained and the opinions he had on how he wanted his Legos organized.

Oh, and those two years also afforded him time to collect thousands and thousands of tiny bricks and so many specialty pieces I can’t even begin to tell you how many there are (most of his Legos come in sets, which contain loads of really specific blocks).  And those thousands of blocks have been living in a giant under-the-bed sweater box like this:

IMG_2326

which meant that our first job was to pull out every. single. piece. and figure out what we were working with.  After that, we could decide what kinds of containers we needed to put them all away again.  This step honestly took two full 8-hr days to complete.  And it was mostly me working on it.  Yep, the kids were there to start us out, but they quickly had much less energy (or excitement??) for it than me.  I was bothered by this for a minute, seeing as it seemed like it was more for me than for my master builder, but I think it was just too big of a job for kids to be able to finish.  They couldn’t exactly see my vision for the end-product anyway, and so this detail-oriented part was ok for me to finish on my own.  The introvert in me kind of likes that sometimes anyway. 🙂

IMG_2325

I spent much of last week surrounded by lots of little boxes and piles of different kinds of Lego bricks.

In the time when I was doing my first round of research for how to organize our blocks, I found many examples of how moms had used IKEA products, and honestly they were all very nice looking.  And probably very expensive.  But, they also didn’t look very user friendly.  Most were organized by color…which I’m pretty sure is not how most kiddos build (or at least not mine….seems more like something a mom would do for herself, not for her kid.  Regardless of how other families did it, though, that method was not going to work for our mounds of Lego bricks). I mentioned that those 2 years gave my builder time to really understand himself and his preferences and this was great as we sorted through them all.  So I started by asking him what he thought we should do, and he agreed that color didn’t make sense, and that instead, we should do it by type or size of block.

After those 2 days of sorting, an afternoon of planning for containers and then shopping (we ended up choosing Sterilite containers that I found for a steal at Big Lots), gave us what we thought ended up looking great and being REALLY user-friendly.  I have been told by my kiddo that it is working really well, and I would agree, since every piece has it’s place now.

And the best part is that there are labels on each box, that art both specific to our Lego pieces and our names for them.  Yep, there’s a box for “slanty” Legos, and one that says “holey” and well as once that just says “special,” which he uses for particular pieces he’s pulled out for a project and isn’t ready to put back in their appropriate box yet.

Oh, wait, and the top has a dual-purpose, too: it’s both for building and for reading.  We added two base plates to the top of the middle (attached with velcro), and I made pillows to cover the whole thing for when they’re not being used from a sheet I already had, and a tutorial I found here.

We are so happy with our final product, and it’s a part of our house that gets used (and cleaned up up!) every day. 🙂

IMG_2374

Rm. 202 Kids Take Over–Read Aloud Take 2

I am so excited with what’s happening in our room with Read Aloud lately.  The level of excitement, confidence and pride that is present because of all of these super 2nd grade readers sharing their skills is definitely impressive.  Some kiddos have even signed up more than once on the calendar!!

The only thing I have to say that makes me really sad is that there are couple of kiddos who only have pictures (rather than videos) because my devices were not cooperating on those days.  I HATE that, because everyone of them has done a SUPER job, and you’ll miss them.  Just take my word–every read aloud has been A. Maz. Ing.

Gotta share that chart that she used, too. 🙂  It needs some edits (so please look past the typos 🙂 ), but it was such a great idea that she came up with on her own.  She was very prepared for her lesson. 🙂

IMG_1624

Please take a minute to leave a comment for our brave, super talented, 2nd grade readers! Way to go, Rm. 202 kiddos!

Second Grade Math Warm-Ups: Week of May 2-6, 2016

I am a little bit late–sorry!  I forgot a few important pictures that I needed in order to properly share.  Hopefully you’ll still read (and learn with us!).  🙂

Monday

There’s not a lot to explain behind this one except that I wanted to continue to focus on the idea of a fraction being EQUAL pieces, not just the number of pieces in the denominator.  As you can see in many of the post-its, most kiddos understand this when they partition the cookie cake for 4 people.

IMG_1628-min

Tuesday

As I mentioned with a problem or two last week, kiddos are to have a basic foundation of groups and arrays to help them with further multiplication concepts in 3rd grade.  We played a game called Circles and Stars last week, which is basically where they roll a dice twice, once drawing circles and then filling each with the 2nd number’s worth of stars.  Then they figure out an equation to go with the model as well as how many stars there are altogether.  I wanted to build on this idea and see what they’d do with a new problem.  As is seen on their answers, they almost all drew circles with stars (or dots).  I wanted to help them see the same idea as an array, as well, so I connected the equation to brownies (so they pan/array would make more sense).

FullSizeRender 156-min

Wednesday

Somewhere I had saved a picture of my original problem which looked like this (the purple writing on the chart): If I had a pan of brownies that had 7 brownies on one side and 5 brownies on the other, how many would I have?  When I looked at the answers, I was completely baffled as to why so many had answered 6X2=12.  We had a great decision about how they used 7+5=12 and then made a multiplication equation that matched.  There were also some pretty interesting models/pictures of the equation, too, so I drew an array to show what I meant.  Once they saw it, they could see what I meant, but we agreed that the problem I had written didn’t lead them to that understanding.  I asked them to help me figure out how I could have better written the problem so that they could have seen what I meant.  We worked to revise the question so it made more sense.  This was a GREAT conversation both about math and revision, which is something Rm. 202 friends know happens ALL THE TIME, not just in writing.  They did a super job of helping me redesign the warm-up so that it better matched what I wanted to know.

FullSizeRender 159-min

Now it reads: If I had a rectangular pan of brownies that had 7 columns of brownies on the long side of the pan, and 5 rows of brownies on the other, how many would I have in the whole pan?  Draw a picture.   Great work on the writing and the math, Rm. 202 friends!

Thursday

IMG_1786-min

Friday

We’re still working on many concepts all at once, and solidifying our understanding of them.  Love my little speech bubble?  We always talk about how the numbers in the problem scream at us to tell us which strategy is most efficient for them, so it just seemed fitting. 😀


Forces that Shape the Earth: Slow and Fast Changes

I shared some building challenges we had done a couple of weeks ago, where we solidified our understanding of both bodies of water and landforms.   We still had some thinking to do, as well as demonstrating that we understood the difference between slow changes and fast changes that happen on Earth.  Besides using things like Legos, big blocks, pattern blocks, and other things to build with, we often incorporate art into our science and social studies work and represent ideas with pictures.  This was one of those times.  It was a mural/collage project, much like these that have happened in 5th grade (with both regular units as well as with test preparation).

Our first step was to jot down what we remembered about slow and fast changes we’d already learned about.  We made this chart together:

FullSizeRender 147-min

We brainstormed what we knew about the difference between slow/fast, as well as examples of each, and the causes for these effects on the land: wind, water and ice.  Their directions were then to create a representation (2D with paper and other art supplies) that everyone could recognize and explain when they looked at the poster.  No words (except for the two parts of EROSION and WEATHERING since these were important vocabulary terms) were allowed.

While kiddos worked, they went through the design cycle as they planned, created, tested (by sharing their representation with another group or two to see if others could recognize the concept they were trying to display), redesigned and then shared by putting their creation on our poster.  This mural did a couple of things for Rm. 202 learners–helped them solidify understanding of concepts, demonstrate that understanding, as well as remind them of that learning as they connect the picture to the idea in their heads.  I plan on using the images on this poster as a part of our assessment at the end of the unit (I just haven’t fleshed out exactly what that will look like yet…still in the design phases!).

Here are the images on our mural.  Can you tell what each of them represent?

FullSizeRender 139-min

Each one up close.  Half are slow changes and half are fast changes.  Oh, and there is one image that we thought was an example of both:

I was really impressed with the diligence portrayed while they worked on this project.  There were a couple of pairs who had to go through 2 or 3 versions of their creation before they figured out one that made sense to someone but themselves.  There was lots of cooperation and suggestion that happened during our work session, too, as kiddos bounced ideas off each other, shared supplies and asked other pairs for help.  Another example of an engaging, motivating and focused way to practice science without pencil/paper or just reading about it.  Way to go, Rm. 202 scientists!

If you want, leave us a comment about what you think our pictures are images of.  We’d love to share our learning with you.  What questions do you have?  We’re becoming experts on these ideas of forces that shape the land! 🙂

Rm. 202 Kids Take Over–Read Aloud!

Last week I was having a reading conference with a friend, and as we were talking about TBR piles and good book recipes, another idea came to me that would help one reader, and then in turn many others: kiddos doing read aloud.

As I continued to talk to this friend about books, I suggested that he choose a book from his new TBR pile to share with the class.  We talked about how he would have to prepare to do this, including practicing holding the book up so that everyone could see the pictures.  It was totally picture-worthy while he was working.

And maybe the best part was when he turned to me and said, “Wow, this is hard.  My arm hurts!  Is it hard for you, too?” We had a great little chat about how teachers have to have strong arms. 🙂

He continued to work and was ready to present to us.  Man was he excited!

Check out the stories he shared with us:

Well…as you can imagine, this sparked interest by many other people to be able to share with us at read aloud time.  And what a great idea, as I considered all of the many things kiddos learn on both sides of this opportunity.

We began to schedule read alouds in a couple of ways: I gave some friends the assignment based on books we were reading in our small group together, and some friends just began to request a spot.  And since then it’s become a “have-to” for everyone.  It’s just such a good idea that we (ok, probably I) decided all should participate!

Amber took the next turn, and did a super job of matching up to what my lesson would have been that day anyway–good readers use evidence from the text to support their thinking.

Then on Friday, Emily took her turn and taught us about fiction/non-fiction (as well as using some pretty great teacher moves for management!) with The Little Work Plane.

Now don’t worry if you don’t see your favorite Rm. 202 friend in this post–each will get their turn.  While I had originally never intended to take this path with readers in our room, it’s a SUPER example of how organically ideas come up for us, and how kids’ ideas are often the BEST ideas! Thanks, Rm. 202 kiddos for taking chances, learning new things and then sharing that learning with the rest of us!

Mystery Skype–April 14 (#3)

We’re on #3 Skypes in about 2 weeks!  YEHAA!!  Today was the 2nd in two days!

Like last time, we had jobs, but at the end of the last session we decided to trade.  Unlike last time, our camera worked, though (did I mention that?  They were Skyping with a blank screen the whole time! 😦 ).

By the way, this post has made me think it might be a good idea to start a new page just devoted to Mystery Skypes.  Would make it easier for us (and everyone else!) to find the archives when we need them.

This was another great session, and at the end I’ll share what we know now that we didn’t know just three short sessions ago. 🙂

Screenshot 2016-04-18 21.14.57

Screenshot 2016-04-18 21.15.23

This slideshow requires JavaScript.

The debrief this time was a question about how much more they know now than they did just a couple of short days ago.  Here where their responses when I asked “What do you know now?”

  • “I am a better greeter because I’ve practiced three times. I don’t need my dos/don’ts sheet anymore!” JH
  • “Now I can visualize a map in my head when they ask a question.” KB
  • “My job was easier today [than yesterday] because I wrote shorter words.” EM
  • “I think doing a job more than once makes it easier.” AM
  • “I know more about maps.” PM
  • “I know more about what to do as task manager.  I can just sit and watch what’s going on [and give reminders when they need them] instead of walking around.” AK
  • “I know where to stand and use better angles to take better pictures.” CB
  • “I am better at Twitter.  I did it almost alone!” JM

What great thinking, Rm. 202 friends!  As always, you amaze me with your reflection and insight. 🙂  Keep it up–excited to see what happens as you keep going with Mystery Skypes!

Mystery Skype–April 13 (#2)

Remember our Mystery Skype last week?  Well after that AMAZING experience, the first things that came out of my kiddos’ mouths were “When are we doing this again?”  That meant that I had to get busy because I needed to schedule another one for them! I tweeted out a request and quickly I got many requests.  One of them was today.  Here’s the story. 🙂

We are all about learning in Rm. 2o2 and so the first thing we did was reflect on the experience from last week and talk about what had happened.  I showed them the blog post I had written and asked them to think about what they saw.  We analyzed the photos and talked about what we would do the same and what we would change.  Some noticed that there were not pictures of everyone, and we agreed that the next photographers would make sure to get images of each job that we had on our list.

Next I showed them the video from our first try.  We did the same analysis and noticed somethings we could change.  Many of the “issues” just came from the fact that this was the first try at something like this for our videographer.  We talked about some technical things like shooting at people’s faces (and not their legs and feet), not moving the camera too fast (because it makes the watcher d-i-z-z-y!), not talking over the recording  and making sure–just like the photographer–to get the WHOLE room in the video.  We made sure everyone knew that we were only working on how to make our next try even better, not saying that anybody did anything wrong.

It was time to pick jobs and so we sat down to decide what each person would do.  After our debrief from last time, we had decided to add in Tweeters (check out the AMAZING job Mrs. Sisul, Ja’Mia and Makayla did today!) and Closers, so that made just two people doing each job.  Rather than the chart we made the first time around, I thought I’d try to start digitizing some things, so I made our job list in a Google Doc like Mr. Solarz’s example.   I just made a doc that we can add pages to for each MS (at least that’s my plan for now) so we can keep track of who’s done what during each session.

Screenshot 2016-04-13 19.58.54

I hope to start using a Google Doc for questions next time, too.  For today we hand wrote them and I entered it into the table:

Screenshot 2016-04-13 21.12.45

We had to go to PE right after this, but before we left, we agreed we should get everything set up, since we only had 10 minutes from when we got back until we got started.  I was SUPER pleased that this was what I saw them do:

The Data Enterers had their area ready, the maps for the Researchers were laid out, the chairs for the Questioners, Greeters and Closers were in place and the Photographers and Videographers had their iPads raring to go!  Isn’t it amazing what 7-8YOs can do when they are motivated and have a purpose? LOVE!

Here are the photos we collected from our session today:

This slideshow requires JavaScript.

And the video.  Don’t worry–this one’s a bit shorter than the one from last time.  And you should get sick and dizzy either.  At least I hope not. 🙂

Then, when we were finished we sat down to debrief.  We said many of the same positive comments as last time, but I noticed many kiddos were a little unhappy about their jobs this time around.  Well, some of them were.  When we went through the assigning of jobs, obviously some kiddos got the one they wanted, and the others didn’t.  We talked about what to do about it, and we were divided about how to fix the problem.  We suggested that we could stay with our original jobs, since we felt that we had done a great job of finding the right person for each one (which we had agreed upon after we finished the first time around).  Not surprisingly, not everyone liked this idea.  We also considered just staying with the new ones we made today, since we didn’t really have time to reassign before our next scheduled Skype tomorrow morning.  Again, not everyone agreed this was the best.  Then, someone quietly suggested that we could trade.  He said, “What if I want a new job and so does someone else. Can we trade jobs?  That might work.”  BINGO!  Everyone loved this idea and so we quickly had the “traders” meet on the rug and most got a satisfying trade out of the deal and walked away happy.  Unfortunately, since there was an odd number, one person did have to stay with a job they don’t really like, but I’m sure it will all work out and next time she’ll be able to try something new.  Oh, and I had forgotten until now, but I would be remiss if I didn’t mention that one of the reasons someone gave for trying new jobs every time was “I like to make mistakes so I can learn something.  That happens when you try new things.”  HA!  Pretty amazing, right?

And you know, as fun as this is, and as much as it reinforces geography and inquiry and does loads for engagement and motivation, I just love watching what happens when you get out of the way, let kids do their thing and they run the show in ways that are far beyond what you’d think the realm of 2nd graders would be.  But then again, I continue to see it over and over, so I should stop being so surprised, right? 🙂

Design Challenge: Landforms

Last week we tried a challenge in Science where kiddos had to create a representation of a body of water.  Since then, I’ve heard multiple times “When are we doing this again?”  Then, when my friend, Mona, asked me if I was planning on doing the same thing with landforms I knew we just had to!

I didn’t want to make the situation exactly the same, however, so I thought of ways I could change the parameters to up the level of the challenge.  Last time, students chose their own group, as well as the materials they used to build.  It was great that somehow everyone chose something different and there was no arguing about who used what.  That doesn’t happen a lot in our room, but I was super glad it didn’t come up here.  So this time I again let them choose who they worked with (which because of numbers was groups or 2 or 3), but there as more chance in both their landform AND their building material.  I wrote the choices on index cards (very high tech, I know) and put them in two cans.  Each group chose one from each container.

I was impressed with how easily kiddos accepted both of the cards without complaining.  Again, not much of that happens with Rm. 202 friends, but I was pleased with how quickly they got to work planning their next moves.  After about 3-4 minutes, most were ready.  There was only one pair who did fuss a teeny bit about how they’d be done really fast and how their cards were not a challenge.  We talked about how that meant that they needed to figure a way to challenge themselves, ask themselves “What could we do differently than we had originally planned?”

Much like last time, they had 25 minutes to work on their representations and then we’d do a gallery walk to see if we could guess what everyone had created.  They were to work for the entire time and had to use their assigned medium, but other than that there weren’t too many rules.

Ok, here’s your chance to see if you can figure out our landform creations, and then I’ll give you the answers.

IMG_1219-min

IMG_1220-min

IMG_1221-min

IMG_1226-min

IMG_1223-min

IMG_1224-min

IMG_1225-min

What do you think? Did you guess them?  Here are the answers:

  1. plains
  2. hills
  3. valley
  4. barrier islands
  5. canyon
  6. plateau
  7. mountains

We love how building challenges work for learners in Rm. 202, and we want to know how they work for you.  Any stories to tell us?  What suggestions do you have for future design challenges we could try?


I Saw Pacifique! Pacifique is HERE!

Remember last fall when we were able to host some amazing Rwandans in our school? Well, since he is now forever connected to our Robinson family (and some teachers in our school, too), he comes back now and then to visit.  When he was here at the beginning of March, we joined Mrs. Appelbaum’s class next door to learn more about his Rwandan culture (since were in a culture study of our own at that time!).

He answered our questions, and even sang and danced a little for us.  What a great visit with an old friend!  He really is a celebrity around our school now. 🙂