Rm. 111 is Going Places!!

As I mentioned in the post about I Wanna New Room, as well as in the post about directed drawing, we did lots of projects during our first days back after the holidays.  Partly its because we only had a two-day-week (can I get a woot-woot for that one??), but also because easing back into work and being with friends after being away for two weeks is always a good idea.

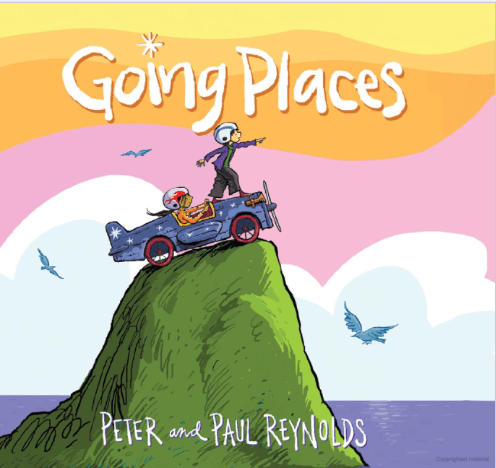
Another thing we did that went SO WELL and that kiddos LOVED, was when we read the book Going Places (thank you Peter and Paul Reynolds for this amazing text!) and did a design challenge. 🙂

screenshot 2019-01-07 11.11.42-min

I’m not really sure from where this challenge came, but we’ve done it in 1st grade for a couple of years and it’s been super.  I think this time around, though, we upped the ante a bit and had kiddos share their creation in a different way.

First of all, the book.  We are BIG fans of Peter Reynolds, so when I showed them this one, they were already “in.”  When I told them that they’d be doing a challenge based on it, they were even more excited.  I heard them say “We love challenges!” <3. And then, later on, I heard “We LOVE this story!”

After the story, I gave them the directions.  They were to build something that would help them “go places,” using a kit that everyone would get (like in the story).   We didn’t talk a lot about what to do or how to do it (because they were so excited and wanted to get busy right away!), but they automatically started looking for partners (again, like they did in the story).  And EVERYONE ended up with someone else with which to share both their supplies and their ideas!

As we got started, I recorded this video, and I love what you hear in it–that “buzz” that happens when everyone is engaged and busy! Check it out. 🙂

Did you notice in the video how they asked if they could use the bag in their creations?  LOVE how they think outside the box (er, bag!) for these projects. 🙂

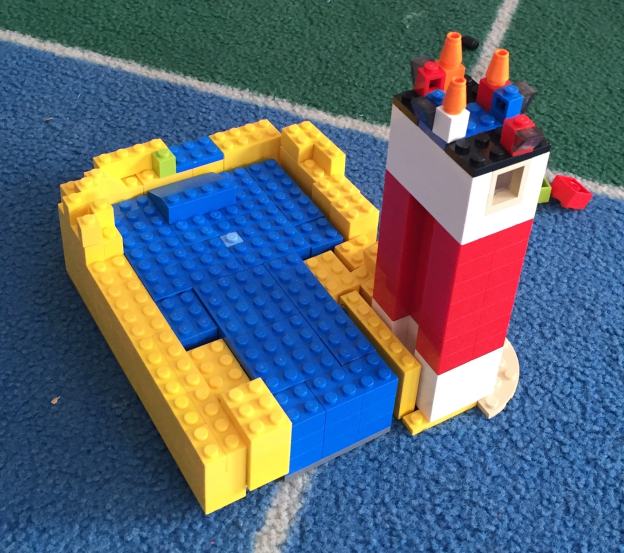
And once our 18 minutes for the challenge were up, kiddos had amazing creations that they wanted to share with their classmates (and you!).

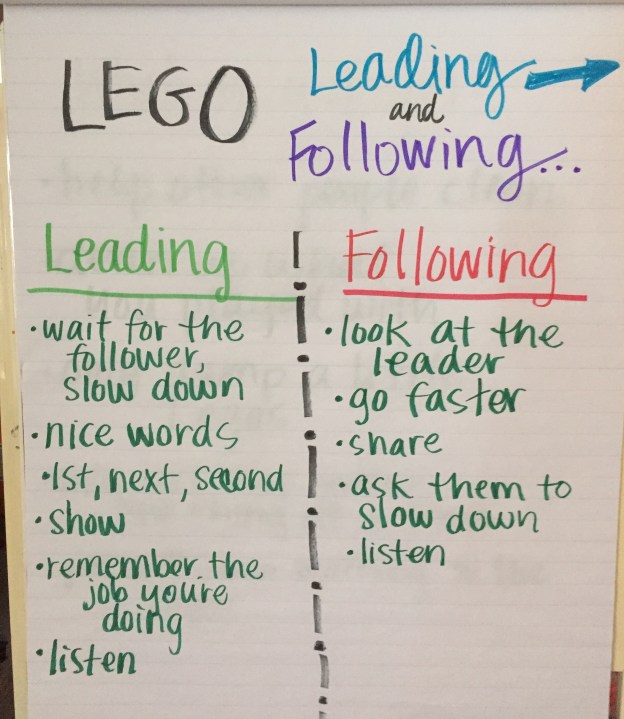
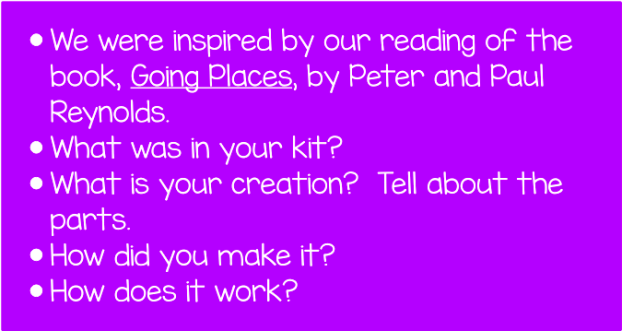
Before we presented them, though, we had a conversation about what information our viewers would want (or need) to know related to our work.  I reminded them that our audience was NOT there for the experience in our classroom, and we’d need to fill them in on the details so they understood what we were doing.  These smart kiddos came up with a very thorough list of what to include in their videos:

screenshot 2019-01-19 19.39.56

They worked with their partner, and another partnership to plan and then record a video of themselves telling you all about what they made.  They were supposed to watch and critique, then revise if necessary, to make sure it was their best work with all the parts.  Many did this, but we’re still in the beginning stages of the “revision” part, so some  might still have some places to improve (i.e. please ignore the places where others friends come in a put up bunny ears while they are recording, or the off-camera comments/voices you may hear).

I will share these videos now, but first I have mention how AMAZING this project was in our room.  We had mentioned in our class that since we’ve come back from the holidays that kiddos have really stepped up their game; they are much more mature, focused and on task than ever! We ended up working on this project for close to 3 hours of our day–and most of us were engaged, busy and hard-working during that time. :). We had a debrief after it was all said and done (which I will write about in another post), and we talked about how much more we will be able to do as learners when I can count on them to be busy and working–monitoring their own thinking, time and planning–for long periods of time.  We’re excited for where we will be able to go and what we’ll be able to accomplish. :).

Ok, and so back to what they actually made.  It’s pretty great, so hope you enjoy!

https://app.seesaw.me/pages/shared_item?item_id=item.33170479-62b9-4cb8-9e83-504d828e5f7f&share_token=XryFCy6wTvSONIzdYCrFQw&mode=embed

https://app.seesaw.me/pages/shared_item?item_id=item.7ac9f957-8256-45a3-a852-8c6ef16119b5&share_token=g4DRxAMCRreJ2zoPi6t9ew&mode=embed

https://app.seesaw.me/pages/shared_item?item_id=item.6bb3a271-515e-48c2-a8d6-ace4afd02918&share_token=wsxZpLVUTnK0wEGMGCMlvg&mode=embed

https://app.seesaw.me/pages/shared_item?item_id=item.f03353a7-a886-4450-ac87-db98214388cc&share_token=FtFxInpcTdyN4yWU_DEbBw&mode=embed

https://app.seesaw.me/pages/shared_item?item_id=item.2d320a83-6968-41b9-87a9-b05a61c00e07&share_token=Myjigt5dRr2Clbsl35wFiQ&mode=embed

https://app.seesaw.me/pages/shared_item?item_id=item.1b832acb-f674-4bef-9b6f-e9555b26809e&share_token=67oq-Ef7Ss-gW5lUNu1cfw&mode=embed

Thanks for checking out our work, and sharing this journey with us.  We’d LOVE to hear what you thought–leave us a comment! 🙂


10 Lego Math

Last week during our Bike Rodeo in PE, we did a math investigation around how many wheels were on the bikes in our bike row in the gym (yeah, I know…I should have shared that post first.  Sorry. 🙂 ).

It was our first try with math notebooks and working to communicate our mathematical thinking in words, pictures and numbers.  Kiddos are expected to be able to do that thoughtfully and clearly, based on this rubric:

Screenshot 2017-09-27 21.26.34This is an end-of-year expectation, but we learn about it early and work on it all year in different ways.

As I looked over the work kiddos had recorded in their notebooks, I noticed that kiddos mainly just wrote numbers.  Ok, really a number.  Just the answer to whatever question they were working on.  The words and pictures parts were pretty much MIA.  It’s still early, so this is neither surprising nor worrisome–we just need some work on what it means to clearly and concisely show what we did to solve a problem.

While we could have done this in a variety of ways, I took a super smart suggestion from my friend, Mrs. Marks, (who you might remember inspired this Lego Leading/Following lesson) who thought she would walk a bit backward and have her kiddos work on just representing something really small they that had counted, made, etc.  Perhaps because the first “Mrs. Marks” lesson was using Legos, or maybe because they’re the best tool ever, or we all love them or we have a TON of them….but regardless, I framed our next communication lesson around a Lego creation invitation.

With the goal being using words, pictures and numbers (as necessary) to explain their thinking and making their explanation match their creation, kiddos were given a baggie with 10 random Legos.

Then I gave them these directions:

IMG_1516

For the first part, kiddos only worked on steps 1 and 2.

As we moved to the next step, I did a think aloud as I drew and then wrote about my own creation.  We talked about what information would be helpful to know if they were going to build a replica of my tower (because that’s what they will be doing next!).  They gave great suggestions of words to use and we revised and added to the words, also discussing what labels might be helpful.

IMG_1547

Somehow I didn’t get a picture of my tower, but I promise it looks just like that drawing. 🙂

Kiddos’ next step was to work on their drawings and writing, with nudges along the way to add or revise to make sure their thinking was clear and complete.

Today we finalized our thinking, took a picture (to compare our drawings and creations) and posted our work on Seesaw.  We used the recording feature to read our writing and add any details we thought were important.  Next step is that we will build each other’s creations and discuss what information in our work was helpful, confusing, and/or missing.  We will then try again with another creation and see if improve.  Kiddos have been so excited about this work and I’m excited to see how it impacts our math work going forward.

How do you use Legos to learn?  We’d love to hear your ideas.  🙂

LEGO Lessons: Leading and Following

I have been a LEGO lover for a long time…yeah, probably my whole life in some form or another.  Those forms have been many: as a kid building houses with my brother; admiring whole LEGO towns that a friend had built in his basement; watching my kids start to play and build with them (in a much more sophisticated and creative way than me, I might add.  I could only build houses.  Because those are rectangles and that’s what you dod with LEGOS is build rectangles, right?  I kid, but that’s how my brain used to work); learning how to best organize them based on how a 6 year old plays with them (it’s not by color, by the way, as many Pinterest boards will suggest); and then as a teacher learning to incorporate building, creativity and play into my classroom.  I have had opportunities over the years to try new things and learn from other LEGO-loving educators and so have been learning how to better use LEGOS as a learning tool (in addition to them just being a super fun toy during choice time and inside recess!).

So far we have used them “officially” to build our names (pics later!) as well as on Friday in a LEGO lesson on leading and following that was SUPER!  Let me tell you all about it…:)

We started our day with an easel question that looked like this:


In case you missed it on those post-its, kiddo shared FABULOUS ideas about leaders:

  • the help people
  • they are teachers
  • they have followers
  • they are the person in charge
  • they are the boss

We talked about what it was like to be the leader, and times in their lives when they have the opportunity to be the leader, or to be in charge.  Some were at home and some were at school.  They also shared times when they had to be the follower, and how sometimes you don’t have a choice about what your leader asks (or tells!) you to do, and that sometimes you might not like it.  We also talked about how sometimes there are situations where you have to be BOTH a leader and a follower: a specific place this happens at school is when you are in line.

After we talked about this idea and had a pretty good idea about what it all meant, we went outside to practice.  We played follow the leader and wound ourselves all around our Robinson playground.  It was fun, but was also a little tricky, because often someone would not be paying attention and their follower would then not know were to go, or would go a different way than the rest of the line!

Once we got back inside we pulled out LEGO learning tools and tried another activity I learned from a SUPER smart colleague of mine, Mrs. Marks.  Kiddos worked with their carpet partners (a friend with whom they sit on the rug for our learning times, use when we do turn-and-talk, and someone they pair up with for a variety of learning situations) to build a LEGO structure.  One person was the leader, and had to lead their partner (the follower) to build the same structure that they built.  Man–this is harder than it seems and requires both partners to pull from a specific skill set.  It’s also a little tricky because they can only use the pile of LEGOS they are given, and so much be careful with their block choices, ensuring that there are TWO of everything so their partner can copy their work.  After a certain amount of time, partners switched and got to try the other role.

For the most part, things went swimmingly and pairs figured out how to work successfully in the role they were given.  Learners knew they had succeeded if at the end they had two identical structures.  Their smiles are proof of their pride. 🙂

As is routine in our class, we had a debrief when we were finished (because the process of an activity is as important–if not more-than the product!).  Kiddos shared what they had to do to be successful in each role, and compared how these were often different depending on which one they were in.

FullSizeRender 13

As with many most of the lessons we do early on in first grade, we will come back to this experience time and time again.  There are so many nuggets of wisdom in that chart that will help us be successful in the future, the first grade future and beyond!

Rm. 202 Kids Take Over!

This will be the first of several posts that document some changes that have been taking place in Rm. 202’s neck of the woods over the last two weeks.  We’ve been dealing with some struggles and are working on working through them.  Kind of like in the beginning of the year when we were working on working together.  Remember?  And in true Rm. 202 and Robinson form, we’re problem solving as a class to figure out what to do.  LOVE THAT!  It hasn’t been easy, but with so many great brains working on the solutions, it’s coming along.

Here’s the beginning of the story…

We had had many days where our class was struggling to follow directions, listen to each other (including me!) and struggled with working well as a group.  Of course I was frustrated, and knew that it meant something had to change.  Luckily, because I know that these choices mean they’re telling me something (rather than just that they’re bad kids, or trying to make me crazy, or that there is no hope! LOL), I choose to try to figure out how to help them change those choices, by teaching or reteaching behavior, or by restructuring some other part of what we do everyday.

And because I work in the best school in the best school district anywhere, I am lucky to know about using a problem-solving model with most every classroom bump in the road.  I learned years ago about how to use the ICEL protocol for this problem-solving and it came in SO handy to us lately.  Basically it helps you problem-solve through a variety of items, starting NOT with the kids in your class, but with how you are teaching them.

screenshot-2016-12-17-20-13-19

So as I worked through how to best respond to the struggles we were having, I logically started with the I in ICEL, which has to do with HOW we’re learning and HOW I’m choosing to present things.  Sometimes an easy tweak in this area can provide the response you were looking for.  And also luckily (wow–do you get how blessed I am? LOL), I have a super supportive group of coworkers who are ALWAYS willing and able to help.  We happen to have a place to post questions and ideas so I wrote this, looking for some suggestions:

screenshot-2016-12-17-20-38-37

And like I said, there ended up being LOADS of friends who gave their support and ideas for how we could respond, and even better than just helping me, anyone who read the thread could benefit. #collaborationforthewin

This response was what got us to this blog post today:

screenshot-2016-12-17-20-42-03

And since I cannot step away from a double dog dare, but more because I knew she had a point with her suggestion and was thinking we’d get some good results from it, I started our next day with this as our easel question:

fullsizeoutput_124a

Apparently I haven’t asked a question like this in a while, or they are programmed to answer this “learner” question in a certain way, because on our first draft thinking, their responses were “be quiet” or “listen to the teacher” or “be a good friend.”  Of course those are all good things, but what I was asking was more like the answers on this second draft are responses I as expecting.  The notes are grouped by type and the big pile at the bottom (not surprisingly) say PLAY.  The rest say things like READ, WRITE, CODE, and DRAW.  And yes, there were at least two that said they’d enjoy doing anything.  Yes, girls, you’re my favorite students.  LOL  Just kidding!

We gathered for morning meeting and got busy building our schedule for the day.  Again, this surprised my students MUCH more than I thought it would; I think I give them choice ALL THE TIME and work to be really responsive to what they need and want.  Funny that this seemed so crazy to them.  Anyway, we decided that they could choose to do something from the list of blocks/cars, art, Legos, or iPads.  We also reviewed how, since this was normally the time when we did writing and sci/ss, they had to figure out a way to include those things in their work.  I also gave the offer to let some friends help me start a bulletin board that first grade was in charge of making–4 friends took me up on this offer.  The rest made their choice and got busy with their learning plan for the day.  They had to start in their area by talking with the others kids there about how they’d use the tools they had available to them.  As we got busy, I shared with them that we would stop to share our work after a chunk of time (I think I gave them about 40 minutes).

Once they had time to work on their creation, we gathered in each area so groups could report to us on how they spent their time.

When we returned later in the day, we got busy writing a report on how we had spent our morning.  More on that later!

Oh, and I know you want to know how it went….this was one of the most pleasant mornings we’ve had together in a while. 🙂  They had choice, they were engaged, they managed their bodies and were in charge of their learning.  And I went to lunch with a smile on my face (for whatever that’s worth. 🙂 ).

Please be sure to come back for the next chapters of the story–it’s a great one!  Rm. 202 kiddos have GREAT ideas! Can’t wait to tell you about it.

Lego Organization: From a Builder’s Perspective

For my son’s 7th birthday I promised him a “new” room.  He had grown out of his “big boy” transportation room (which was really just a more grown-up version of his nursery), and needed something that could last a few more years as he got older.  As may 7YOs, he was TOTALLY into Lego, and it seemed a likely theme that would work for now, as well as for many more years.  I knew that if I made sure the background was neutral and the “changeable” stuff was where the Lego came in, that would also ensure that he’d have longer before it was dated.

Well, lucky for us me, I had just painted my living room/kitchen in a fabulous gray color that is pretty close to the color of Lego base plates, and had almost a gallon leftover!  This was the foundation we needed!  The walls were quickly gray and then I worked to figure out bedding, curtains, arts, etc.  I was hoping to sew most of it, but who knew that Lego doesn’t have fabric?  Well maybe somewhere and it sells for hundreds of dollars a yard, but I could not find any in the traditional fabric stores around me, or anywhere I could think of online.  It ended up being a blessing in disguise, however, because we ended up finding options that were far more basic, and which allowed me to be a little crafty.

We landed on this bedding, and I found the pillows (and some other ideas we didn’t end up using) here.   It is reversible, too, so I think right now it’s even turned over the other way.

For art, we had many ideas, but only ended up using a few of the ones we started with.  One was pretty basic, and is just paper, made to look like Lego 2x2s, and the other stuff we added is not Lego-related, but is instead kid-made art from my master builder’s work at school.  Made it even more special!

IMG_2407

We used record album frames because they’re cheap and the size shape!  Just paper, with paper glued on top. 🙂

FullSizeRender

Every year our art classes do a project through Art to Remember, and parents can buy all sorts of “stuff” with their kid’s artwork on it.  We have ornaments and magnets and other things, but decided to use the original pieces as room art.  There are two empty ones because he has 4th and 5th grade to go!  (And yes, I realized they are neither perfectly-spaced or entirely-straight, but for now it’s working pretty well!  (That’s the closet wall)

Ok, so that’s all well and good, right, but I know you’re asking “so where’s the Lego organization part?” Well, ok, I promise it’s coming, but first I must sneak in a little bit of info (that you may have already figured out), and that is the fact that my 7YO just turned 9.  (We are a little slow to finish things around here! LOL)

Part of our problem was that the Lego organization was the project that required the most work and planning in order to complete.  We had ideas for adding a window seat with cubbies, that would allow for block storage as well as a place to play.  We did LOADS of research, and finally decided upon buying pre-made shelves that we turned on their sides so they’d fit under the window.  The detail that took me FOREVER to figure out, though, was that there is a vent right in the middle of the floor under the window.  We didn’t want to cover it up, and couldn’t decide how to deal with it.  Somehow, 2 years into it, I figured out that just adding legs to the cubbies would raise them above the vent, as well as making them the right height for the window seat we wanted.  A couple of coats of black paint (to match the other furniture in the room) and voila!  Win/win.  Well except that he waited on it for 2 whole years. 🙂

IMG_2318

Again, though, as we like to find the positive in all things, the two years he has spent collecting and building with Legos actually helped us in completing this project because of the knowledge he’d gained and the opinions he had on how he wanted his Legos organized.

Oh, and those two years also afforded him time to collect thousands and thousands of tiny bricks and so many specialty pieces I can’t even begin to tell you how many there are (most of his Legos come in sets, which contain loads of really specific blocks).  And those thousands of blocks have been living in a giant under-the-bed sweater box like this:

IMG_2326

which meant that our first job was to pull out every. single. piece. and figure out what we were working with.  After that, we could decide what kinds of containers we needed to put them all away again.  This step honestly took two full 8-hr days to complete.  And it was mostly me working on it.  Yep, the kids were there to start us out, but they quickly had much less energy (or excitement??) for it than me.  I was bothered by this for a minute, seeing as it seemed like it was more for me than for my master builder, but I think it was just too big of a job for kids to be able to finish.  They couldn’t exactly see my vision for the end-product anyway, and so this detail-oriented part was ok for me to finish on my own.  The introvert in me kind of likes that sometimes anyway. 🙂

IMG_2325

I spent much of last week surrounded by lots of little boxes and piles of different kinds of Lego bricks.

In the time when I was doing my first round of research for how to organize our blocks, I found many examples of how moms had used IKEA products, and honestly they were all very nice looking.  And probably very expensive.  But, they also didn’t look very user friendly.  Most were organized by color…which I’m pretty sure is not how most kiddos build (or at least not mine….seems more like something a mom would do for herself, not for her kid.  Regardless of how other families did it, though, that method was not going to work for our mounds of Lego bricks). I mentioned that those 2 years gave my builder time to really understand himself and his preferences and this was great as we sorted through them all.  So I started by asking him what he thought we should do, and he agreed that color didn’t make sense, and that instead, we should do it by type or size of block.

After those 2 days of sorting, an afternoon of planning for containers and then shopping (we ended up choosing Sterilite containers that I found for a steal at Big Lots), gave us what we thought ended up looking great and being REALLY user-friendly.  I have been told by my kiddo that it is working really well, and I would agree, since every piece has it’s place now.

And the best part is that there are labels on each box, that art both specific to our Lego pieces and our names for them.  Yep, there’s a box for “slanty” Legos, and one that says “holey” and well as once that just says “special,” which he uses for particular pieces he’s pulled out for a project and isn’t ready to put back in their appropriate box yet.

Oh, wait, and the top has a dual-purpose, too: it’s both for building and for reading.  We added two base plates to the top of the middle (attached with velcro), and I made pillows to cover the whole thing for when they’re not being used from a sheet I already had, and a tutorial I found here.

We are so happy with our final product, and it’s a part of our house that gets used (and cleaned up up!) every day. 🙂

IMG_2374

Design Challenge: Earthquake Proof Buildings

A week or so ago I saw this tweet:

Since we had been studying slow changes and fast changes in Science for a while anyway, it made perfect sense to try it out!  And unfortunately, there had also just been some major earthquakes in both Japan and Ecuador that same weekend, so the idea of creating earthquake proof buildings was a real life one to solve.  And yeah, it would be fun. 🙂

We began by reading a pretty great Seymour Simon book on earthquakes to gain more information, and answer any questions that might come up about how they work.  Knowing exactly what happens helps us build stronger buildings that would withstand the tremors.

Screenshot 2016-05-01 21.37.27

We talked and discussed and made predictions and inferences.  Then we got with our partners and planned–most on paper and some with some help from their iPad.

Then we got busy building.  The 1st building part was actually spread over two days (an afternoon and then the next morning) because we ran out of time.

This slideshow requires JavaScript.

We used this design cycle protocol to help us know what to do, and wrote down the timing so we could keep on track.

IMG_5810-min

Some even tried out their prototype on the earthquake machine before the “real” deal.  They got some ideas about redesign or shoring up their foundations.

Caught some groups in their planning stages:

We took videos of our trials, and many kiddos voiced their ideas for redesign in their recordings.  We all did some writing/thinking about it, but I’ll share those in another post, since after I add our videos, this piece will already take you 7 hours to read it!  Thanks for hanging in there–it’s worth it, I promise!!

Charlie, Evan and Joshua


Ella Marie and Emily


Millie, Amelia, Ja’Mia and Tyrin


Makayla and Ava


Amber, Sara and Thomas


Peyton, Baron and Landen

Forces that Shape the Earth: Slow and Fast Changes

I shared some building challenges we had done a couple of weeks ago, where we solidified our understanding of both bodies of water and landforms.   We still had some thinking to do, as well as demonstrating that we understood the difference between slow changes and fast changes that happen on Earth.  Besides using things like Legos, big blocks, pattern blocks, and other things to build with, we often incorporate art into our science and social studies work and represent ideas with pictures.  This was one of those times.  It was a mural/collage project, much like these that have happened in 5th grade (with both regular units as well as with test preparation).

Our first step was to jot down what we remembered about slow and fast changes we’d already learned about.  We made this chart together:

FullSizeRender 147-min

We brainstormed what we knew about the difference between slow/fast, as well as examples of each, and the causes for these effects on the land: wind, water and ice.  Their directions were then to create a representation (2D with paper and other art supplies) that everyone could recognize and explain when they looked at the poster.  No words (except for the two parts of EROSION and WEATHERING since these were important vocabulary terms) were allowed.

While kiddos worked, they went through the design cycle as they planned, created, tested (by sharing their representation with another group or two to see if others could recognize the concept they were trying to display), redesigned and then shared by putting their creation on our poster.  This mural did a couple of things for Rm. 202 learners–helped them solidify understanding of concepts, demonstrate that understanding, as well as remind them of that learning as they connect the picture to the idea in their heads.  I plan on using the images on this poster as a part of our assessment at the end of the unit (I just haven’t fleshed out exactly what that will look like yet…still in the design phases!).

Here are the images on our mural.  Can you tell what each of them represent?

FullSizeRender 139-min

Each one up close.  Half are slow changes and half are fast changes.  Oh, and there is one image that we thought was an example of both:

I was really impressed with the diligence portrayed while they worked on this project.  There were a couple of pairs who had to go through 2 or 3 versions of their creation before they figured out one that made sense to someone but themselves.  There was lots of cooperation and suggestion that happened during our work session, too, as kiddos bounced ideas off each other, shared supplies and asked other pairs for help.  Another example of an engaging, motivating and focused way to practice science without pencil/paper or just reading about it.  Way to go, Rm. 202 scientists!

If you want, leave us a comment about what you think our pictures are images of.  We’d love to share our learning with you.  What questions do you have?  We’re becoming experts on these ideas of forces that shape the land! 🙂

Design Challenge: Bodies of Water

We have been studying Earth and how it changes.  We’ve talked about slow changes like weathering and erosion; fast changes like earthquakes, volcanoes and floods; landforms  like plateaus, mountains, plains, barrier islands (which I have to admit I didn’t really know about!); and about bodies of water.  Because we needed to breathe a little bit of life into our work after having been discussing and watching videos for a few days, and because I know my kiddos are builders and creators at heart, I tried to figure out a design challenge of sorts that we could try.  There were many options I could have employed (and still might), but I thought that bodies of water would be a nice place to start.

So kiddos chose groups (in 4s) and then I explained their job: Create a representation of the body of water they get (I passed out cards to each group) so that everyone else can guess what it is.  They had options for research before they got started if they needed clarification on the characteristics of their body of water, and they could use whatever supplies in our room that they wanted.  There was a 30 minute time limit.

So do you think you can guess what each one is?  Try it out.  Here is body of water #1, a picture and a video (oh, and the video might have a spoiler, so guess before you watch it!):

IMG_1169

Ok, here’s #2:

IMG_1166-min

Try it with group #3:

IMG_1167-min

Group #4 made this:

IMG_1168

Check out #5, made with Legos:

FullSizeRender 45-min

Ok, and now that you’re done, check your answers.  Promise that you’ve tried it?

#1–ocean    #2–creek    #3–lake     #4–river       #5–bay

The best part?  We had fun, we learned alot and the only thing I’ve heard since we finished is “When are we going to do this again??” 🙂

Lego Challenges With Mrs. Sisul

We had an amazing 1st-day-back-from-Spring-Break today!  Our principal, Mrs. Sisul, has been learning about engineering and STEM with Legos, and volunteered to come set us up with some Lego challenges if we were interested.  Well, yes, of course, Rm. 202 friends were interested!  Luckily she was free this afternoon and came on up with her big ‘ole box of Legos!  Check out what happened! 🙂

She started with a quick reminder of what STEM means (Science, Technology, Engineering and Mathematics), and then introduced what we would be doing: every kid would get a card with a challenge and they would work to do that challenge with Legos.  Pretty straightforward, right?  Well, they she led us through a great line of thinking about how we work best, and how kiddos would have the choice of how they tackled the challenge: alone, with a partner, a group of 3, a group of 4–whatever worked for each kiddo.  She shared her example that she knows that as a learner she likes to be able to bounce ideas off of another learner, and so she’d focus on finding another person to work with.  She asked me to share my strategy, and I talked about how I knew that that plan would DEFINITELY not work for me.  I am the kind of learner who needs to process and plan by myself first, and then I might want to work with someone else to blend ideas, get a critique or ask a question.  I know that if I went with a partner right off the bat, I wouldn’t have anything to share with them–so if I was Mrs. Sisul’s partner, I wouldn’t be a very helpful partner!  Right off the top I could tell that Rm. 202 kiddos were thinking about what would work for them, and they knew what would be best.  We had all sorts of groups–singles, partners and groups of 3.  Some kiddos worked alone, but right next to another friend so they could get feedback that way.

Ok, once teams were developed, Mrs. Sisul gave the guidelines for how kiddos would get their Legos.  She walked them through a planning session where they were to really think through what kinds of Legos they’d need.  She would call names of kiddos 3-4 at a time, and they’d have 30 seconds to “block shop” and then get started.  Once everyone had an initial visit to the pile, they were free to come back for more.  And since it would be virtually impossible for me to explain the amazingness with which these kiddos followed this protocol, I had to record it.  Check out what it was like when Mrs. Sisul dumped the Legos:

Once we got started, I roamed around and got some footage of them working. I know, kiddos wanted me to do the challenges, too–but I couldn’t document it to share with you if I did that!  Maybe next time. 🙂

Here are some videos that share more of their thinking while they got started:

This one has some great thinking about what happens when things are hard (which this was for some of us!):

There’s one more, and it’s really the one I’m the most tickled about.  It’s an example of what happened in our room when we put 20 kids and 2000 Legos together.  I want you to think about what you see first, but then I’ll tell you why I liked it:

As I watched this video, I noticed these things:

  • quiet voices
  • pleases and thank yous
  • kiddos finding pieces for others
  • sharing
  • everyone just taking what they needed
  • no one grabbing, hogging or arguing
  • kiddos respectfully letting others into the circle
  • focus
  • engagement
  • motivation
  • laughter
  • encouragement
  • respect for self, learning, others and the environment

What did you see? (Please leave us a comment and let us know–Rm. 202 kiddos would LOVE to hear what you thought and would LOVE to know you watched their super hard working!)

Ok, I know you’re wondering what some of those challenges looked like, and how they tackled them.  Here are some examples.  And yes, they told me I could. 🙂

This was definitely one of those touchstone moments in our classroom that we will return to for many days and weeks to come (darn, I only wish we’d done it earlier in the year!).  I know that we walked away with many things (and I hope to share what those were in THEIR WORDS soon), but one of them definitely was that there is not one way to solve a problem.  We could each access each of these challenges in our own way, and use whatever skills, ideas–and Legos!–that we wanted to in order to achieve our goal.  One friend even decided to do the same challenge twice to make it even harder for himself!  We are builders and thinkers and problem-solvers in Rm. 202 and this was definitely right up our alley!  Come back any time, Mrs. Sisul!