As with past years, I was SUPER EXCITED to get my kids blogging! This year was no different, well except that my bloggers are only 6 and 7 years old, and they don’t have iPads yet, and most of them didn’t even know what a blog was when they started in Rm. 202. Ok, so yeah…really different. But my excitement to bring this experience to my students was no different–I just knew I’d have to figure out how to make it work for first graders. I think I’ve figured it out, and thought I’d share my steps here. Many are the same as in years past, but I’ve added in a few that are specific to younger learners. Here we go!
As with years, past, I thought about starting our conversation with the question “What is a blog?” Like I already mentioned, the background knowledge of my students was much less than previous (older) students. I had to go all the way back to the beginning and be really explicit with what in the world I was talking about. Luckily, we’ve been reading this blog since the beginning of the year, so that was a place to start. But, because of my experience with blogging and the connections you can make from all over the world, I started there instead: Wouldn’t it be cool if people from ALL OVER THE WORLD could read what you write? Wouldn’t it be cool if you could TALK to people you didn’t know from far away places? This was the hook they needed. Just the mention of all the people I know from other countries got my kiddos all giddy and ready to go. So “go” we did!
This time around I needed a more visual way of explaining exactly what a blog is and how it is used, and so BrainPop Jr. came to the rescue with a video all about blogs (I should add that it’s actually my 2nd grader who told me this video existed. He’s a big fan and watches lots of Brain Pop while he’s in the classroom waiting for me–which is alot!. He said he knew there was a blogging video and I should try it with my kiddos. Teacher in the making? Thanks, Riley!). It was great in how it told what a blog was, what the parts of a blog are, as well as about comments and some safety tips about what to do/not do online. And since it’s short and familiar, it kept everyone’s attention. Win-win. 🙂
After we watched the video, we looked at some other examples of blogs. I shared many of the ones that I read, and we talked about what we noticed about how they’re laid out, what the theme is, what kinds of things are written on them, etc. (In case you’re wondering, here’s my list: Make It-Love It, I Heart Organizing, The Candy Blog (this one is actually not one I read, but my hubby does and I knew the kiddos would love it!), and Life with Lily (And Daisy and Caleb!). I should have also included Weelicious (which was once a blog and is now more like a traditional website) and Im4Students (my teammates’ blog!), but I forgot until after we were done. 😦 You’ll have to be sure to check them out or use them when you teach about blogs!
It’s a wonder how they waited through all of that explanation and waited for me to explain their next steps, because, like I said, that were EXCITED to get started! And speaking of next steps, the next part was for them to create their own blogs. But on paper first (this is a technique I learned long ago as I started blogging and was learning from other teachers like Karen McMillan (@mcteach) and Pernille Ripp (@pernilleripp) who shared their resources online for others to use!).
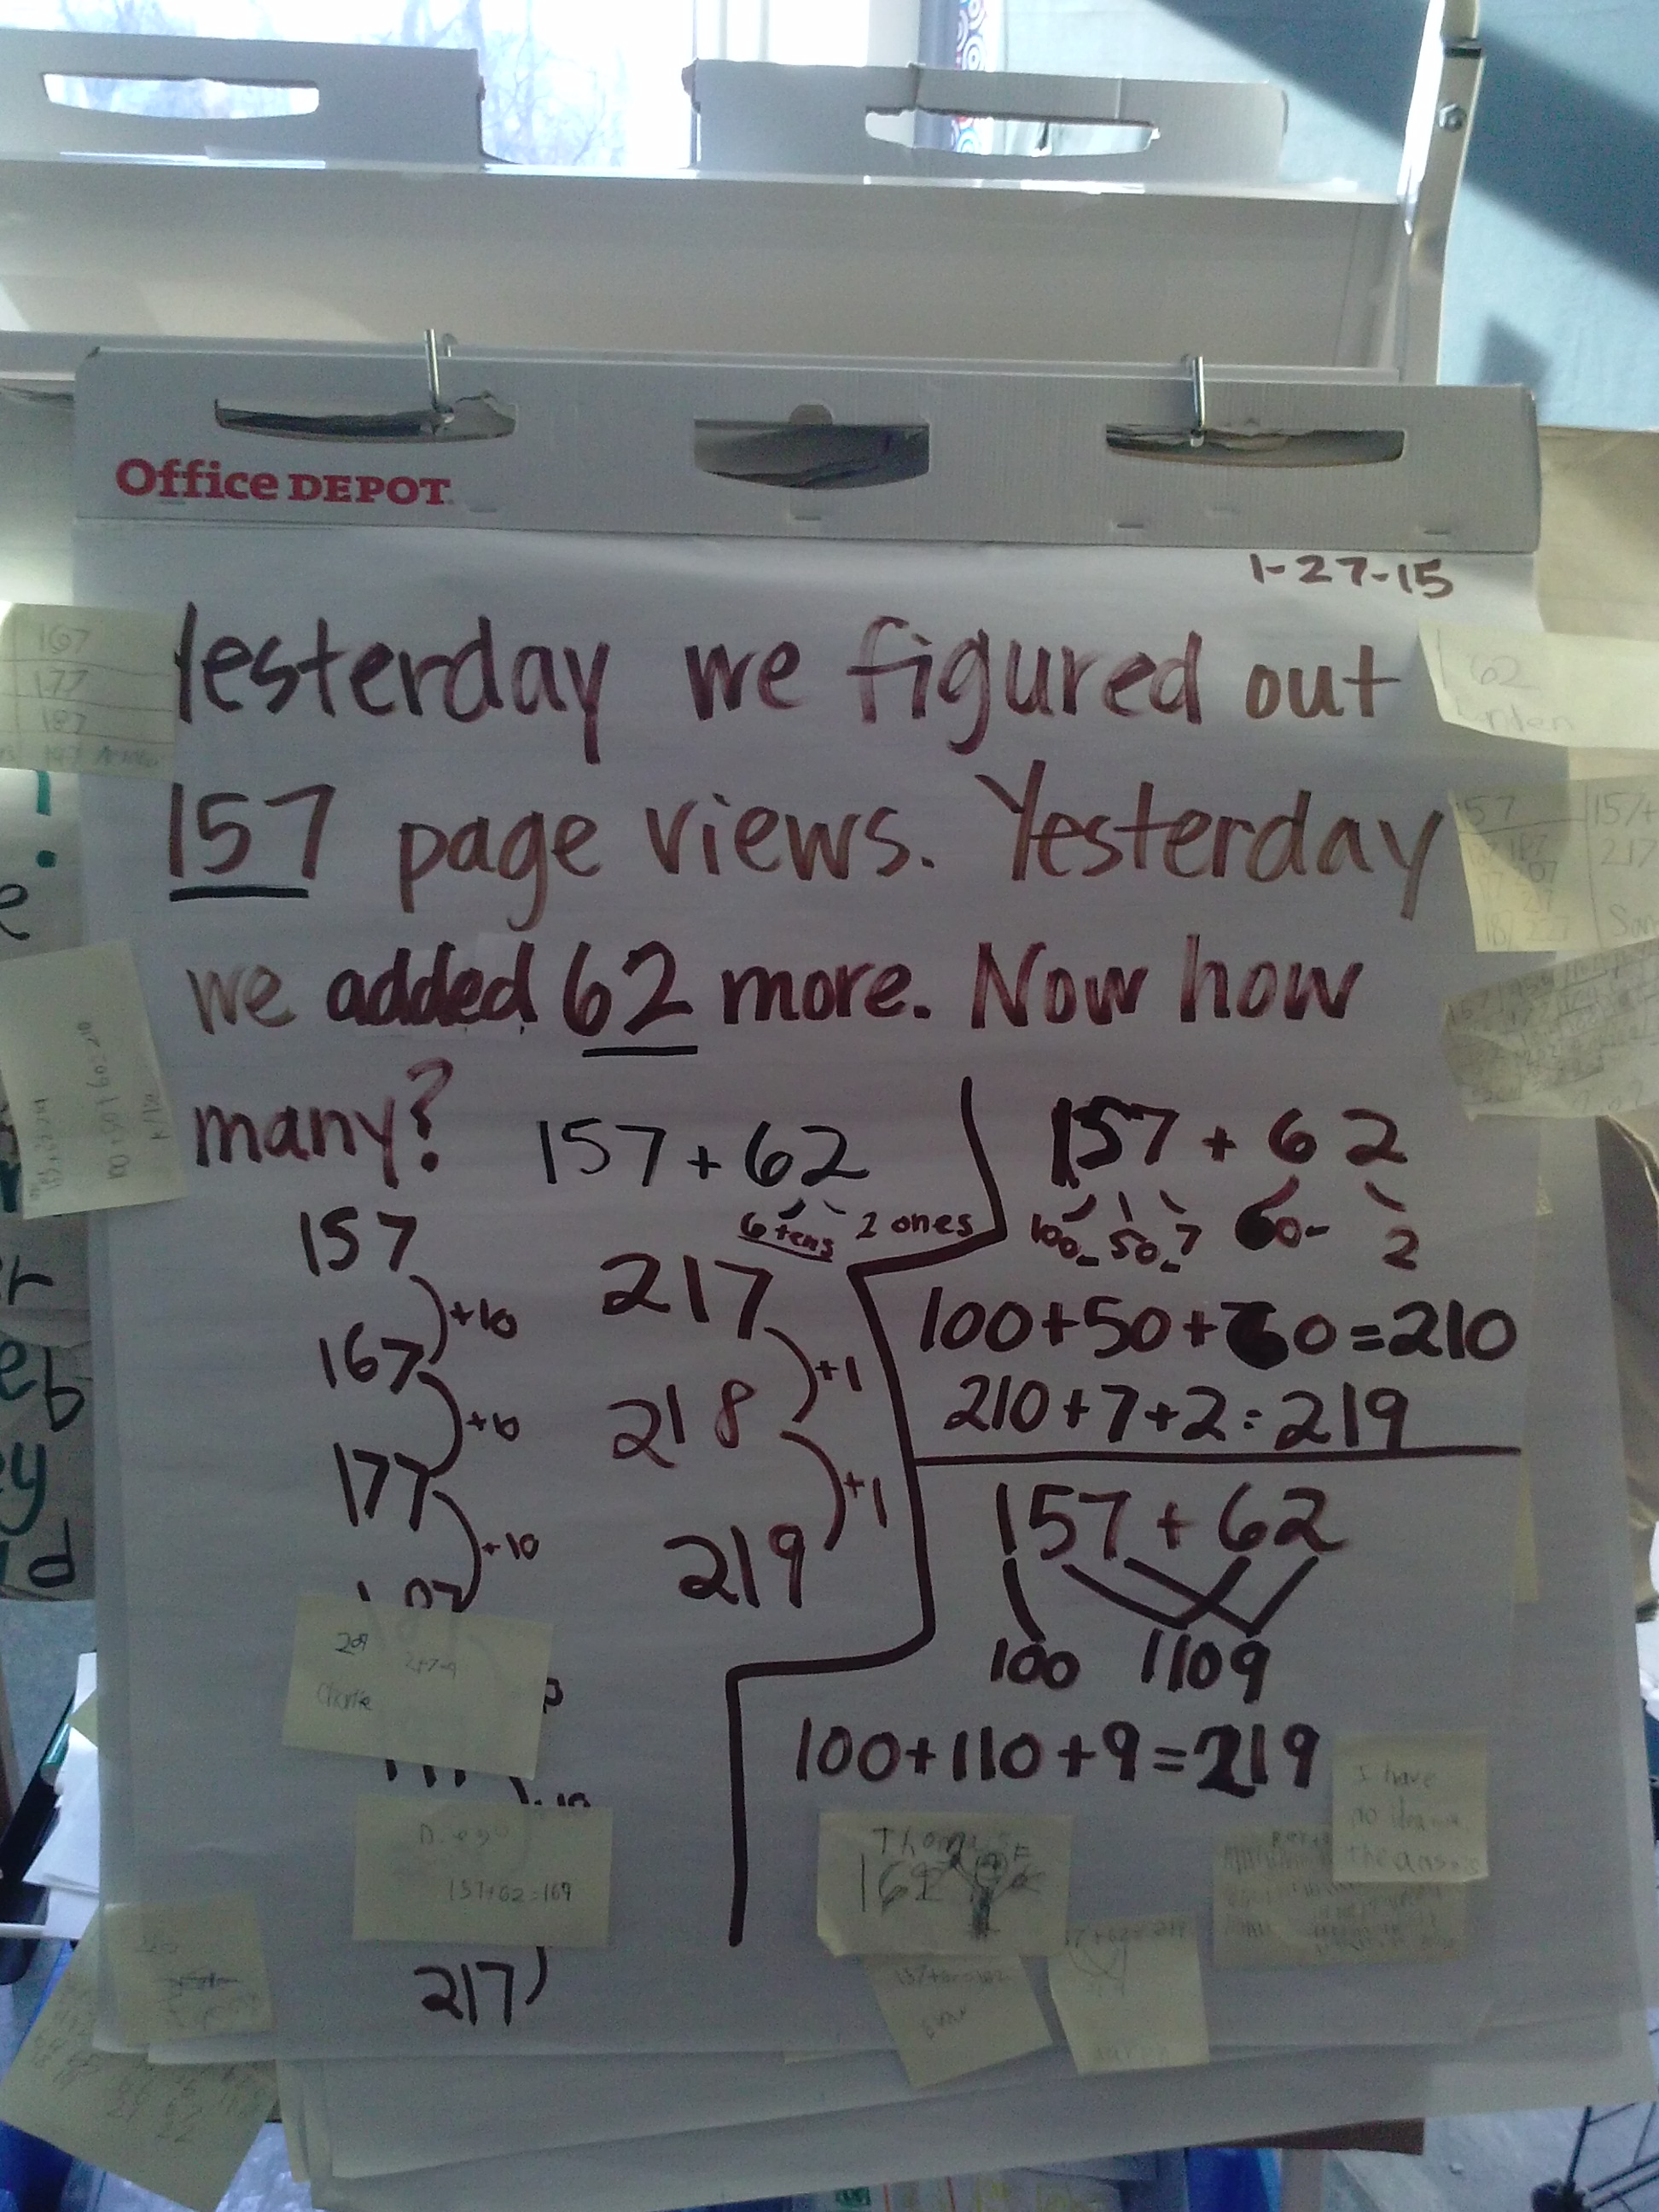
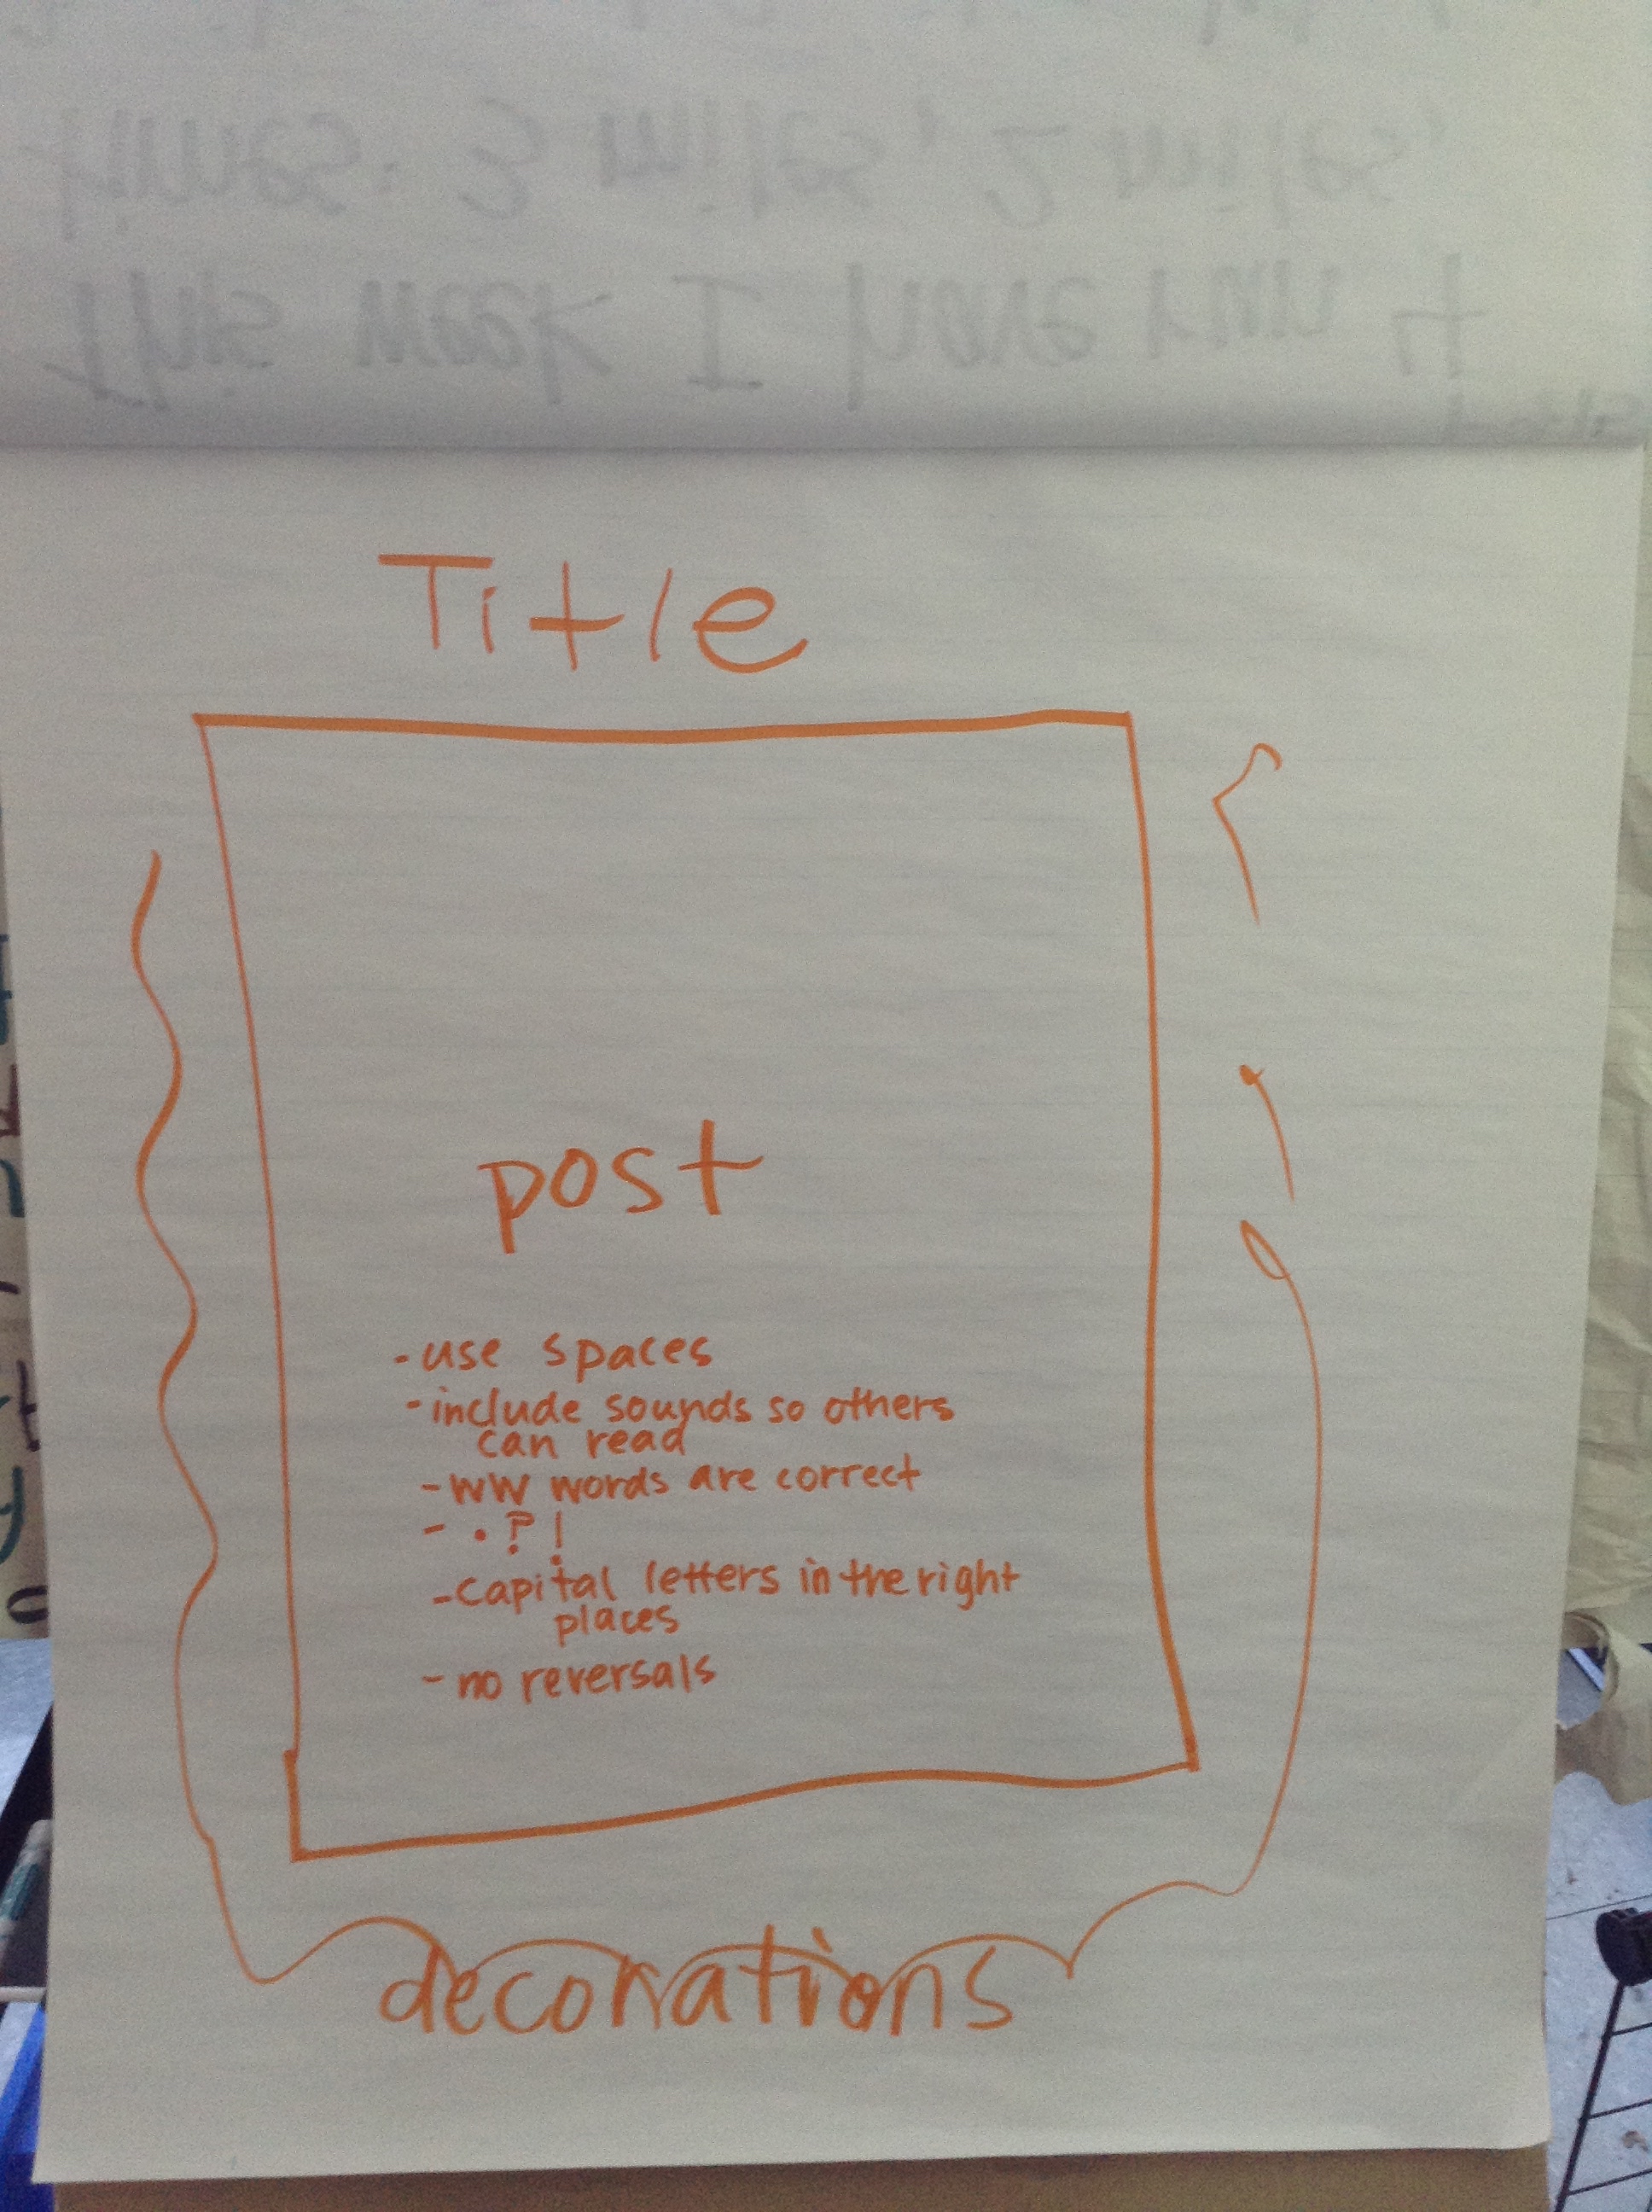
One last thing before we got started: I showed them some examples from past years, and we created a chart to show what should be in our posts.

I was SUPER IMPRESSED with how quickly they took to it! They understood what to do, and did it effectively. Here are some pics while we were working:


Come back soon for Part 2–comments!